
Sharing a photo can feel simple: upload it, send it, post it. But photos may contain more information than you can see. A picture can show faces, license plates, addresses, screens, documents, location clues, and hidden metadata. Before publishing or sending an image, it is worth taking a minute to protect the details that should stay private.
NanoImage provides focused privacy tools that run in your browser, including tools to remove EXIF metadata, blur sensitive areas, pixelate information, and add watermarks.
This guide explains a practical photo-protection workflow for everyday sharing.
What does it mean to protect a photo?
Protecting a photo means reducing the risk of exposing information you did not intend to share. That information may be visible in the image itself or hidden inside the file.
Visible sensitive details can include:
Faces
License plates
Home addresses
ID numbers
Email addresses
Phone numbers
Screens and documents
Children's school names
Location signs or badges
Hidden details can include metadata such as camera information, capture time, editing software, and sometimes location data depending on the device and settings.
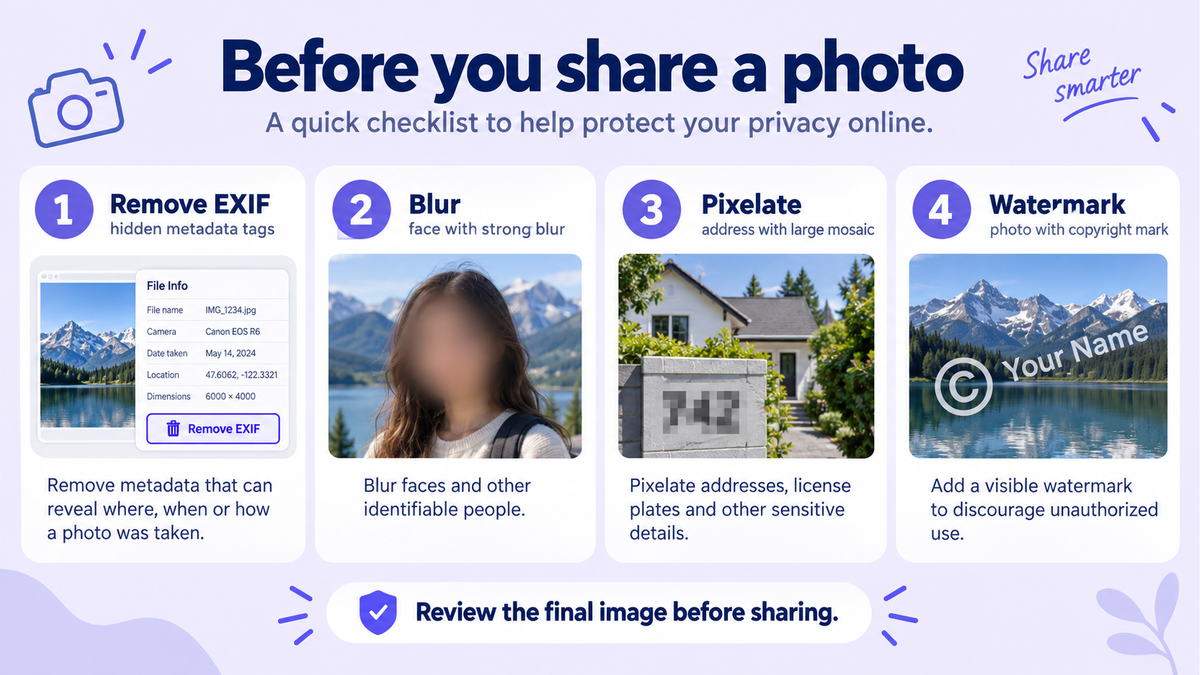
Step 1: Remove EXIF metadata
EXIF metadata is information stored inside image files. It can include camera model, date, time, lens settings, and in some cases GPS location. Not every image contains sensitive metadata, but if you are sharing personal photos publicly, removing metadata is a safe habit.
Use NanoImage's Remove EXIF tool before uploading personal photos to blogs, marketplaces, forums, portfolios, or public social platforms.
Step 2: Blur faces, plates, addresses, and text
Some information is visible and needs to be hidden manually. Blurring is useful when you want to conceal details while keeping the overall image understandable.
Use blur when you need to hide:
Faces in a group photo
License plates in street photos
Names and addresses on documents
Private messages or emails on a screenshot
Account numbers, tickets, labels, or receipts
Children's faces or school identifiers
NanoImage's Blur Image tool lets you blur selected areas of a photo so the sensitive detail is less readable.
Step 3: Pixelate details when you want a stronger mask
Blur can work well, but for certain details you may prefer pixelation. Pixelation makes an area visibly blocked, which can be useful for public screenshots, safety reports, and images where you want viewers to know something has been intentionally hidden.
Use pixelation for:
License plates
Faces in public photos
Identity documents
Payment details
Sensitive text on screenshots
Usernames or internal dashboards
NanoImage's Pixelate Image tool is helpful when you want a stronger privacy effect than a soft blur.
Step 4: Add a watermark before publishing
A watermark can help identify ownership, discourage casual reuse, or label a visual as a preview. It does not provide perfect protection, but it can be useful for photographers, creators, sellers, and teams that publish images online.
Use a watermark when:
You are sharing portfolio images
You are posting product previews
You are publishing client proofs
You want to label images with a brand or username
You want to discourage casual copying
NanoImage's Watermark tool lets you add a text or logo watermark before sharing.
A simple privacy checklist before sharing photos
Before posting or sending an image, ask these questions:
Does the image show a face, address, plate, document, or private screen?
Could the background reveal a location?
Does the file contain metadata that should be removed?
Should a person, child, customer, or coworker be hidden?
Does the image need a watermark before publishing?
Is the final file smaller and cleaner after editing?
If the answer to any of these questions is yes, use a privacy tool before sharing.
Why browser-based tools matter for privacy
When you use an online image tool, it is fair to ask where the image is processed. Some tools upload files to a server for processing. NanoImage is designed around browser-based workflows for common image tasks, which helps keep the process simple and privacy-friendly.
This matters when working with personal photos, screenshots, documents, product previews, or internal images. A privacy-first workflow should avoid unnecessary uploads whenever possible.
Visit Privacy & Protection to see the full collection of NanoImage privacy tools.
Common photo-sharing scenarios
Sharing a street photo
Blur or pixelate faces and license plates. Remove EXIF metadata before posting publicly.
Suggested tools:
Sharing a screenshot
Hide usernames, email addresses, private messages, account numbers, and internal URLs.
Suggested tools:
Publishing product previews
Add a watermark if you want to label the image as a preview or discourage casual copying.
Suggested tools:
Posting personal travel photos
Check visible location clues and remove hidden metadata before public sharing.
Suggested tools:
FAQ
What is EXIF metadata?
EXIF metadata is information stored inside some image files. It can include camera settings, date and time, device details, and sometimes location data depending on the source image.
Should I remove EXIF data before sharing photos?
If you are sharing personal photos publicly, removing EXIF metadata is a good privacy habit. It reduces hidden information that does not need to travel with the image.
Is blurring better than pixelating?
Both can help hide sensitive information. Blur is softer and often looks more natural. Pixelation is more obvious and can be useful when you want a stronger visual mask.
Does a watermark prevent image theft?
A watermark can discourage casual reuse and show ownership, but it is not a perfect protection method. It is best used as part of a broader sharing workflow.
Final takeaway
Before you share a photo, check both what is visible and what may be hidden in the file. Remove metadata, blur or pixelate sensitive areas, and add a watermark when ownership matters.
Start with Privacy & Protection, or go directly to Remove EXIF, Blur Image, Pixelate Image, and Watermark.